Ingredients:
- to people w/o bread machines...you see a recipe you love here at grouprecipes.com but don'tsp have a bread machine - not to worry! you can make the bread with a few alterations.
- this is for any bread recipe that calls for active yeast.
- please see comments and directions below for important and even more tips and tricks of the trade! (some of these come from bread experts...who have emailed me recently)
- ok ready here we go
- equipment needed: mixmaster - with dough hook - though this can be done all by hand such as irish soda bread - but that's another story entirely (since there is no yeast) and another recipe posting i am sure to share soon as march approaches...
- your chosen bread machine recipe you got here at grouprecipes.com
- 3 bowls - 1 that is greased and set aside
- 1/2 cup of extra flour set aside to help work the dough with
- 1 egg white (for a shiny look)
- 2-3 ice cubes if you want an extra crispy crust (do not use ice cubes in electric oven) - see other method below.
- pastry brush
- clean working surface you can have flour on and to work dough on
- wooden spoon
- instant read thermometer
- 1 working oven and 1 working stove top
Directions:
- I would recommend reading this twice before attempting - so as to put the ingredients in the correct order which will help your bread success.
- Divide flour in half and place into two bowls - one for mixer with added active yeast and the other to add in a little bit.
- In with bowl that will be under the mix master beater that has only one half of the flour (with yeast), add special dry seasonings such as the herbs if your recipe calls for it but NOT THE SALT, that goes in the sauce pan first.
- The other special ingredients your recipe calls for i.e.: sun-dried tomatoes, raisins, garlic or nuts, etc. will be added in a bit.
- With spoon, mix 1/2 flour, your yeast and dry herbs till really well incorporated.
- In sauce pan, heat slowly and stir your liquids such as milk and/or water as mentioned in your recipe, sugar/honey, shortening of your choice and salt.
- Heat this till just warm (120-130 degrees) and the butter has almost melted. Do not make this too hot -or you will kill the yeast ! Use that instant thermometer to read temperature.
- Add what's in sauce pan now into bowl that includes half of the flour and all of the yeast that's under the mixer.
- Beat on low to medium speed for 1/2 minute, scraping sides of bowl as you can.
- Then beat on high for 3 minutes. Using a wooden spoon, add remaining flour as you can.
- Then add your special ingredients like the sun-dried tomatoes, raisins, nuts, whatever and continue beating at a medium speed till well incorporated -beat about 2 minutes more.
- Turn dough out from bowl underneath mixer onto the clean working surface that is lightly floured - use some of the 1/2 cup of the extra flour I mentioned above.
- Knead in enough of any remaining flour you had divided in half and you were adding to mixing bowl to make a stiff dough that is smooth and elastic - this is going to take 8 to 10 minutes and lot's of arm strength!
- Hey but you are getting exercise here and it's so worth the effort!
- You may have to add more flour depending upon your bread, this is ok and normal.
- Shape dough into a ball and placed into a greased bowl. Cover with clean dish towel and let rise in warm place till double in size.
- This can take anywhere from 30-90 minutes depending upon warmth of your kitchen.
- You can place this in your oven (which is turned off) to help keep it away from prying eyes or from cool air that may come from your kitchen door opening.
- Once doubled, then comes the fun and violent part of the bread making chore...
- You will know when its ready and has doubled when gently pressing two fingers down on the dough, if your indentations remain, the dough is ready to be punched down .
- Important tip, creating indentations may not work for the more dense breads - for accuracy when the dough has risen properly, use that thermometer again, put it inside the dough and read.
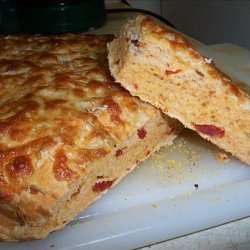
- Dense breads (like my sun-dried tomato) should read 210 degrees while regular white and italian-styled breads should read 200 degrees.
- When all is said and done, get punchy.
- Punch down the dough with your fist...yes, I said punch it down. (you should have seen my grandmother do this - the little thing she was!)
- Only one punch will do. Simply take fist and punch directly down on the dough in the bowl.
- Then cover again and let dough rest again another 10 minutes
- Hey wouldn't you like to get covered to rest if you just got punched?!? Yeah, I thought so!
- In the meantime, take your loaf pan if using that and grease up that baby. Tell the loaf pan that it's going to make the best bread it ever did make!
- Making a baguette shape? Then sprinkle the cookie sheet with cornmeal - ahh yes so that's what the cornmeal was for...
- Take dough and gently (yeah, now that you just punched the living $^%! out of your dough) and gently shape into the shape you want.
- Are you putting it in a loaf pan? Then gently roll it out using a rolling pin into a rectangular shape, then with your hands, roll up like a jelly roll, piercing the ends underneath. Place dough upside down into loaf pan so that the smooth side is facing up.
- If making a baguette styled loaf, roll out into rectangular shape, then roll dough up like a jelly roll and place the seam-side down onto cookie sheet on the diagonal, then pinch ends underneath.
- With all this work, guess what, it's time to rest again - I know - more resting time - but check your dryer - the clothes must be dry by this time.
- Let dough rest 30-40 minutes in a warm place till nearly doubled in size.
- Follow baking instructions closely from your bread recipe - but if you haven't a clue bread recipes usually takes about 30 minutes to bake one loaf of bread at a 375 degree oven.
- Want the bread to look artisan? Sprinkle a little flour on the top of the bread before you create your slashes.
- Want your bread shiny like a new penny? Add egg white wash and using pastry brush, wash bread on top if you would like a shiny look to your bread which also enhances the browning process.
- You may also like to create and cut (more violence here) a few slashes with a knife after it has doubled on the top of the bread which will allow it have beautiful marks when finished baking.
- Want an extra crispy crust? Use this method ONLY if you have a gas oven! Throw a few ice cubes onto the bottom of your preheated oven when placing the bread into the oven- the steam will help create a extra crunchy crust! You can also use your water mister you use on your plants (minus the miracle grow of course) and mist clean water all over your bread just prior to putting it in the oven. This is a good alternative is you have an electric oven.
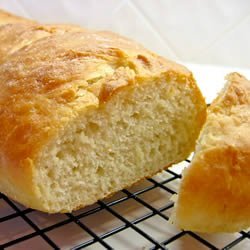
- Check after 20 minutes at first - then again at 30 minutes and knock on your bread (not to see if anyone's home) but to see if it sounds hollow - if it does - you know then that your bread doesn't have any brains - (just kidding - just seeing if you are paying any attention here) - you will know your bread is done when is sounds hollow.
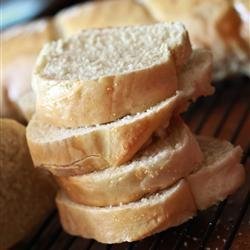
- Once out of the oven, after 2 minutes, immediately remove bread from loaf pans, and off cookie sheets and let cool on a rack.
- It is best to wait at least an hour prior to slicing your first slice, albeit very difficult not to. Like you need anymore resting time!
- But it will allow the moisture in your bread to distribute properly (like resting meat), since if you cut into it right out of the oven, you will allow all that steam to run out of your loaf. It might dry out faster than you had planned.
- Enjoy the smells of freshly baked bread.
- After all of this...wow, what's the cost of a bread machine anyhow? - you MUST BE THINKING NOW! rofl - but these tips are for real, from my grandma to me to you, despite my lame attempts at making you laugh while learning a few things and tricks about bread tips and tricks that came from my Grandma Nelle.
Nutrition Facts
| Amount Per 1 Serving | |||
| Calories | 23.47 Kcal (98 kJ) | ||
| Calories from fat | 3.74 Kcal | ||
| % Daily Value* | |||
| Total Fat | 0.42g | 1% | |
|---|---|---|---|
| Cholesterol | 0.04mg | 0% | |
| Sodium | 16.02mg | 1% | |
| Potassium | 20.29mg | 0% | |
| Total Carbs | 4.25g | 1% | |
| Sugars | 0.98g | 4% | |
| Dietary Fiber | 0.29g | 1% | |
| Protein | 0.83g | 2% | |
| Iron | 0.2mg | 1% | |
| Calcium | 1.4mg | 0% | |
| Amount Per 100 g | |||
| Calories | 239.13 Kcal (1001 kJ) | ||
| Calories from fat | 38.06 Kcal | ||
| % Daily Value* | |||
| Total Fat | 4.23g | 1% | |
|---|---|---|---|
| Cholesterol | 0.38mg | 0% | |
| Sodium | 163.25mg | 1% | |
| Potassium | 206.78mg | 0% | |
| Total Carbs | 43.33g | 1% | |
| Sugars | 9.98g | 4% | |
| Dietary Fiber | 2.91g | 1% | |
| Protein | 8.5g | 2% | |
| Iron | 1.5mg | 1% | |
| Calcium | 14.1mg | 0% | |
* Percent Daily Values are based on a 2000 calorie diet. Your daily values may be higher or lower depending on your calorie needs.
Find out how many calories should you eat.
Get Your Recipe of Health!
Follow RecipeOfHealth on Facebook!

